
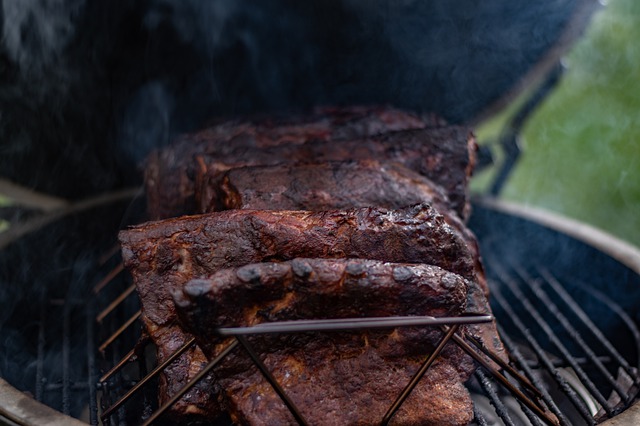
321 ribs – fall off the bone smoked ribs recipe
Smoked ribs are some of the best tasting food around. Whether they are baby back, spare, or country style ribs makes no difference on how delicious they are. The meat on these bones is about as tasty as you can get.
The one downside to smoked ribs is that sometimes they can be tough and not fall off the bone tender when done cooking. If so, there are a few things you can do to make them fall-off-the-bone good!
First off, if your smoker has either a water pan or an integrated water pan you need to use it while smoking the ribs. Some people say that this will keep the ribs from getting too dry while cooking because steam is created in the pan which keeps moisture in the smoker and around the meat.
If you don’t have a water pan and still want to do some fall off the bone smoked ribs, you can place an aluminum tray filled with water into the smoker by itself next to where you will be smoking your ribs. This method works well too because it keeps moisture in the smoker even if there is no water pan involved.
There are also two different ways that you can go about smoking ribs so they turn out tender enough to fall off the bone: The 3-2-1 smoking recipe and The 2-2-1 smoking recipe.
Ready to know more about the 321 ribs – fall off the bone smoked ribs recipe? Keep reading!
Table of Contents
Buy Quality Ribs
Before we talk about 3-2-1 ribs and other recipes, let’s talk about your meat. Pork ribs that is.
If you want the best barbecued ribs, then buy the best quality ribs because no cooking technique or secret sauce will transform inferior quality meat into award winning ribs.
Most of us have no option other than to buy pre-cut ribs. But, if you can buy from a butcher, it’s the best way to go.
No matter where you source your ribs, here are a few tips when buying:
Don’t buy: Meat that is browned or slimy; Broken ribs (“shiners”) where the bone breaks through the meat; Avoid skinny ribs that are mostly bone and Can you smell the meat even through the packaging? Run away!
Do buy: Ribs with plenty of meat and marbling (fat); The meat should be bright pink and firm; and Choose whole racks with 11 to 14 ribs.
There are a few different types of pork ribs, but mostly people buy spareribs or baby back ribs.
Spareribs have only the meat that grew while the hog was alive, not varied depending on the butcher’s cut, what they decide to trim away.
Baby back ribs come from the loin, and the butcher controls the thickness of the meat, depending on how much they decide to leave on.
If you can buy from a butcher, ask him to custom cut the baby back ribs off the rib roast and leave some extra meat on them. The extra meat on each glorious rib is worth the few extra bucks you’ll pay.
Pork Spareribs vs. Baby Back Ribs
If you’re going to follow the 3-2-1 method, you’ll need to buy pork spareribs. This type of rib has a ton of meat on the bone, with a high concentration of fat that will be rendered out during the long cooking process.
Those of you who prefer baby back ribs will have to alter the formula to a 2-2-1 procedure instead. Baby back ribs will dry out if they’re exposed to the direct heat for three whole hours before being wrapped in foil.
You may like this: Top 9 Best Smokeless Indoor Grill
Choosing Your Wood
It goes without saying that when it comes to smoking, wood flavor contributes greatly to the end result. That’s why you should choose carefully.
On one end of the spectrum, you have milder woods, such as cherry and alder. In the middle are stronger flavors like pecan and oak. Hickory and mesquite are the most intense, with mesquite being so strong that it’s only used sparingly, even by experts.
We’ve found that a cherry and hickory combination is ideal for pork ribs. It’s a good idea to use more cherry than hickory, as the latter can taste unpleasantly bitter if it’s used in large quantities. This is especially true when the meat will be exposed to the smoke for long periods of time, as it will be here. A 70-30 ratio of cherry to hickory should be a good bet.
Notice: You can change the wood you choose instead of following our recipes below
Sharpen your knife before cooking
Sharpening a knife is an essential part of maintaining its usefulness. A dull blade can sometimes be dangerous because it requires more force to use, increasing the likelihood of the knife slipping and cutting you. When cooking with meat, using a sharp knife is much safer than using a dull one. If your knives are already in bad shape, you’ll want to take them in to be professionally sharpened or purchase new ones for this task.
Step 1 – Clean Your Knives
First, clean your knives thoroughly before beginning any work on them. Removing all food residues will ensure that when you start cutting into the steel of the blades, they won’t get introduced to unwanted chemicals or salts or too much moisture, which may corrode the metal. Clean the handle and the blades separately because you do not want to introduce any dirt or other unwanted matter into that area where your hand will be gripping and moving it around.
Step 2 – Select a Sharpening Stone
You will need a sharpening stone for this process, which you can purchase at many online retailers such as Tysons Corner Cutlery . There are several kinds of stones — some less expensive than others. The basic types include oilstones , water stones, and diamond stones . You’ll want to select one made from durable materials; otherwise, the small particles of metal removed during sharpening may become embedded in them and cause damage. Oilstones must also be lubricated with mineral oil regularly to maintain their effectiveness; otherwise, they may stop cutting properly. Water stones can be cleaned by rinsing them with water, while diamond stones tend not to require much more than an occasional dusting.
Step 3 – Sharpen Your Knife
Now that you have your sharpening stone picked out and ready to go, just get to work! Rest the blade of the knife on the stone, making sure it is aligned correctly so that you don’t ruin it or hurt yourself. Hold your dominant hand in place on top of this hand’s wrist with your fingers pointed away from the knife so that if it flips over onto its back, you won’t cut yourself. Then rest one of your other hands’ fingers on top of that hand’s index finger — this will act as a guard to keep your fingers from getting cut. Then, place your dominant foot on the knife’s blade; again, making sure that it is aligned properly so you don’t hurt or ruin it.
Step 4 – Sharpen the Knife
Now hold the knife down firmly with both hands while using your feet to help guide its movement across the stone. As you do this, make sure that all of your other fingers are clear of whatever part of the knife is touching or moving across during sharpening. The whole process may take several minutes to finish at first, depending upon how dull your knives are and what type of stone you selected. Make sure not to apply too much pressure while sharpening — just use enough force to get metal off of the blade’s edge.
Step 5 – Clean Up
When you are finished, be sure to clean your knife thoroughly again to remove any metal particles that may have built up during sharpening, as these are harmful if left on the blade of a knife. Also dry off the handle so it doesn’t corrode from being left wet or introduce unwanted dirt or other residues into it. Finally, put your knives away in a safe place so they don’t get damaged again accidentally. This is often done by slipping them into their protective sheaths and then placing them inside kitchen drawers or cabinet spaces for storage. You can also use magnetic strip holders, for example for storing cutlery (knives, forks).
See more: 10 Best Electric Smokers Consumer Reports and Ratings in 2022
Dry rub – a necessary ingredient for your rib
Dry rubs are simply a mixture of dry spices or seasoning that you rub onto the meat, either ahead of time or immediately prior to starting the cooking process.
As the name suggests, dry rubs, as opposed to a wet rub or a marinade, have no liquid components and, as such, tend to allow the meat to use its own moisture in the cooking process.
How does dry rub work? How a dry rub works is that it helps retain the natural taste and moisture of the meat while, at the same time, adding a unique texture and flavor in the process. Depending on the cooking process, a dry rub does this by forming an outer crust layer that hardens around the meat as it’s cooked. Because of its lack of liquid component or element, dry rubs tend not to add more moisture into the meat as the spices sleep their way within. The end result is a crunchy outer texture and a soft and flavorful interior.
What are the different types of Rib Rubs? In a way, it’s safe to say that the possibilities for different types of dry rubs are limitless. If we look at the various dry rub recipes and combinations for ribs, though, we begin to notice a trend or pattern that, more or less, commonly repeats itself in multiple variations. At its very core, however, we can say that there are essentially four types of dry rubs, which are the following:
Spicy: Basically, this includes dry rubs that incorporate hot and spicy ingredients into the mix, such as chili peppers or other hot seasonings.
Sweet: These are rubs that use sugar or other sweeteners that make for a sweet and flavorful texture around and inside the rib.
Savory: Savory dry rubs can be a combination of sweet and salty spices but with an added twist in the form of cinnamon or smoky seasoning, thereby intending to give the rib a special and unique umami taste.
Herb-Infused: These rubs use special herbs, such as oregano or rosemary, as a core ingredient in the rub. The end result is a fragrant set of ribs that not only smells good but also tastes equally excellent.
Five best suggestions for dry rub:(321 ribs – fall off the bone smoked ribs recipe)
Type 1: Goode Company BBQ – Rib Rub
This dry rub is great for preparing ribs, and it has only ingredients that are natural and healthy for you: paprika, sea salt, onion powder, garlic powder and chili pepper. There’s no MSG at all present in the mix of flavors; instead of using unhealthy ingredients like MSG, this product makes use of spices to give you a delicious flavor on your meats or sausages or anything else that needs the magic touch. Even those with gluten allergies will be fine as this product is created without wheat as well as other gluten-containing items such as barley and rye.
Type 2: Bone Suckin’ Sauce – Sweet and Zesty Competition Style BBQ Seasoning
Another barbecue seasoning on our list that is only natural and doesn’t use MSG or items that are not healthy for you. The same as Goode Company BBQ – Rib Rub, this product by Bone Suckin’ Sauce contains paprika, sea salt, onion powder, garlic powder and chili pepper. This dry rub is perfect for pork ribs, beef ribs but it’s also great with other meat products like hams or any other type of sausage.
Type 3. Plowboys Yardbird – Competition Style Chicken Seasoning
Plowboys Yardbird products include a dry rub which can be used on grilled chicken to provide flavor without using unhealthy ingredients like MSG or gluten ingredients found in wheat flour. Just like the previous two items presented here on our list, this seasoning uses paprika, sea salt, onion powder, garlic powder and chili pepper.
Type 4. Plowboys Yardbird – Competition Style Steak Seasoning
This dry rub has multiple uses: steak seasoning & poultry seasoning. It’s a great product for all meat lovers out there from vegan to the most carnivores that want only the best for their meals. You can use it on steaks or chicken or whatever else needs to be prepared with this magical mix of natural ingredients. The same as the previous two products presented on our list, this one also contains paprika, sea salt, onion powder, garlic powder and chili pepper in its mix of flavors.
Type 5. Three Little Pigs Pork Rub – BBQ Dry Rubbings with 4 Main Ingredients: Paprika, Sea Salt, Onion Powder and Garlic. It’s a mix of paprika, sea salt, onion powder and garlic that will add great flavor to your meat products without including additives or chemicals in its ingredient list. It has a simple recipe with only 4 main ingredients so you know it’s going to be the healthiest rub possible without using anything else but these ones listed above. The product is gluten-free which is great for people with celiac disease or other types of allergies too. Plus it comes from reviews as “the best tasting BBQ dry rub” out there on the market!
Make your own dry rub. For some people who don’t prefer pre made dry rubs on the market, you can make your own signature dry rub with your own favorite flavors. And here is a way how to make your own dry rub.
Ingredients:
– Salt (adds flavor and dehydrates the meat)
– Sugar (makes it sweet, adds moisture, and helps to form a crust)
– Paprika (mild chili pepper from ground powder of chili peppers from bell pepper plants)
– Garlic Powder or Onion Powder (helps flavors stick to the surface of the meat easily and adds saltiness with a hint of onion or garlic flavor. It also forms a dark crust on grilled/smoked proteins)
– Cayenne Pepper (the most common ingredient in hot chili powders because it has an intense, spicy heat that mellows when cooked. Use more cayenne if you prefer a hotter rub)
– Ground Black Pepper (The most common, basic seasoning to use in a smoker. It helps bring out the flavors of other ingredients and is a flavor enhancer that will help all your other flavors break through)
Instructions:
– Mix all dry spices except black pepper together.
– Add black pepper powder to the mixture later on.
– After the meat is cooked, coat with oil or butter before sprinkling over dry rub spice mix as evenly as possible.
– Coat as much as you can.-You should do this prior to cooking so the fat from the drippings from smoking process can spread throughout the seasonings
– Once it’s covered with spices well, start grilling/smoking meat for 12 to 18 hours.
Make it even more special:
– Add a personal touch to your dry rub by adding ingredients that you prefer, such as brown sugar instead of white, or add more heat with cayenne pepper.
– After the meat is cooked, coat with oil or butter before sprinkling over dry rub spice mix as evenly as possible.
– Coat as much as you can.-You should do this prior to cooking so the fat from the drippings from smoking process can spread throughout the seasonings.
– Once it’s covered with spices well, start grilling/smoking meat for 12 to 18 hours.
– If baking in an oven, apply up to 4 hours before cooking time begins and bake at a low temperature (225°F) until done.
– If barbecuing or smoking, apply up to 2 hours before cooking begins and smoke using a temperature of between 225°F and 300°F degrees so the spices have enough time to absorb into the meat as it cooks.
The 321 ribs – fall off the bone smoked ribs recipe is here! Keep reading!
The recipe for cooking rib
Firstly, The 3-2-1 smoking recipe. The first method is called 3-2-1 smoking. With this method, you smoke the ribs for three hours without any smoke flavor at all (many people use apple wood chunks or chips for this step). After three hours of cooking time, take the ribs out of the smoker and wrap them in foil. The foil should not completely seal off the ribs from all air flow, but it will help to keep some moisture inside. Cook the wrapped ribs for two hours. After two hours, open up the foil and brush on your favorite barbecue sauce. Finally, cook for one more hour without smoke or sauce.
More details about the recipe:
321 Ribs – Fall Off The Bone Smoked Ribs Recipe – Called 321 ribs because that’s the number of days in a year. Beer, brown sugar, garlic salt, and pepper are the ingredients for this dry rub which makes fantastic smoked barbecue ribs.
Ingredients For Dry Rub:
- 3/4 Cup Brown Sugar
- 1/4 Cup Paprika
- 2 Tablespoons Pepper
- 2 Tablespoons Garlic Salt
- 1 Teaspoon Onion Powder
- 1 Teaspoon Chili Powder
- 1 Teaspoon Ground Cloves
- For Rib Preparation:
- 6-8 Pounds Pork Baby Back Ribs
- About 16 Oz Of Your Favorite Barbecue Sauce
- About 12 Oz Wood Chips (Apple Or Cherry Are Recommended)
- Paper Towels Aluminum Foil Wire Brush Instant Read Meat Thermometer
Recipe (321 ribs – fall off the bone smoked ribs recipe):
The night before you are going to prepare your ribs, wash them thoroughly. Place them in a plate or tray and cover tightly with aluminum foil. Refrigerate overnight making sure they stay covered the whole time.
To Prepare Your Ribs The next day separate each rack of ribs by cutting through between bones. Some people like to cut off the membrane on the backside of ribs first but this is optional.
I do not like using my kitchen knife for this job since it makes short work of an already blunt kitchen tool so I use something sharp that I don’t mind throwing away – therefore, I use scissors! (If you don’t want to throw yours away, pair these up with an old dish towel before attempting to cut through the membrane on your ribs. It’s been my experience that if you do this you will not have a problem with slipping and cutting yourself.)
In a small bowl combine all of the ingredients making sure to spread them around so there are no clumps. Apply the entire mixture evenly over both sides of each rack of ribs being sure to get it into every nook and cranny possible. Wrap each prepared rack tightly in aluminum foil making sure all the edges are sealed up as much as possible.
Place these bundles back into the refrigerator for 3 hours or more before smoking, turning occasionally so they marinate evenly throughout. They can stay like this for up to 24 hours if necessary (Do not be shy about applying more dry rub to your ribs before they go back in for another 3 hours if you feel it is necessary.) To prepare your smoker, fill up the smoker with charcoal and get the temperature around 225-250 degrees.
Once heated, spread wood chips on top of hot coals making sure to close the lid on your smoker. I prefer apple or cherry woods with these ribs but use whatever you have available – even plain ol’ hickory will do! Place racks directly over the drip pan (instructions for this will be included with your specific brand of the smoker) or away from any heat source if using an offset method. Close the door/lid on the smoker and adjust vents until reaching desired temperature peaks of 250 degrees which should be maintained for 1 hour per pound of ribs. For Rib Basting-This step is optional and not in the original recipe.
After 2 hours into the smoke, open up all vents on the smoker and remove the bottom grate from your grill. Brush one side of your ribs with barbecue sauce and replace the rack back onto the smoker making sure to cover it again tightly with aluminum foil. If you are continuing to baste them throughout the process you can remove the top rack next time around but make sure everything has been wrapped up tight before opening the door/lid to make this change! Repeat the above steps another two times during the smoking process ensuring that each layer is well sealed after finishing a brushing or applying a dry rub. After 4 hours unwrap both sides of ribs liberally an hour before ribs are finished cooking to increase the temperature back up to about 275 degrees. Use tongs to remove one of the foil-wrapped racks from the smoker and place it on a cutting board directly over your favorite barbecue sauce.
Carefully peel back aluminum foil until you have completely exposed all sides of the rack being sure that none of the sauce drips onto your smoker. Using a basting brush, cover each side with an even coating of sauce being sure not to miss any spots. If necessary, re-wrap the rack using another sheet of aluminum foil. Return this perfectly basted rack back into your smoker for 1 hour at 350 degrees or until tender enough to pull apart easily with just two forks! Once done, serve immediately unless you want them kept warm for a little while, in that case, wrap them up tightly with foil and place them into an empty oven until ready to eat.
Secondly, 2-2-1 smoking recipe. So why are they called 2-2-1 ribs? Because you smoke them uncovered for 2 hours, then smoke them wrapped in foil for another 2 hours, and finally finish them off uncovered for another hour. Now, depending on the size of the ribs and the temperature of your smoker, they might be done a bit earlier or later, but a minute here or there won’t make a big difference. Just make sure they’re nice and tender before removing from the foil.
Ingredients
- 1 rack baby back ribs any loose meat removed, membrane on back removed, rinsed and patted dry
- Prepared yellow mustard generic is fine
- Your favorite BBQ rub to taste
- Honey to taste
- Chili sauce
- Margarine the kind in a squeeze bottle works best
- Your favorite BBQ sauce
Instructions:
Fire up your smoker for 225 F. Use a medium or light wood. I prefer hickory, cherry, apple, peach or maple. Spread a thin layer of mustard on both sides of the ribs. Dust lightly with the rub. Smoke for 2 hours, bone-side down. Lay out a large piece of thick foil (double it if using thin foil). In the center of the foil squeeze out a thin line of honey, a few teaspoons of chili sauce, and a line of margarine.
Place the ribs bone-side down onto the center of the foil. Squeeze out another line of honey, a few teaspoons of chili sauce, and some more margarine along the meat side of the ribs. No need to spread out the ingredients. Seal the foil tightly and return to the smoker for 2 hours or until you can easily slide a toothpick between the ribs.
Carefully open the foil (the escaping steam will burn!) and remove the ribs, placing them directly on the smoker grates. Reserve the basting juices and brush them onto the ribs. Smoke another 30 minutes, brushing with the basting juices every 10 minutes.
Now, brush the ribs then BBQ sauce and smoke another 30 minutes or until the sauce is set as you desire. Let rest 10 minutes before slicing and serving.
Are the Ribs Done? There are several ways to check if your ribs are cooked to perfection, but these next two methods are my favorites. They’re less invasive and won’t ruin your ribs.
Way 1: The Toothpick Method: Like testing a cake for doneness, you will stick a toothpick in the center of the meat between the ribs. If it goes real nice and easy, they’re done. It means the collagen has turned to gelatin and everything is nice and tender. Check two or three spots to be sure, and you won’t ruin the meat. If you are new to cooking ribs, try poking raw ribs with a toothpick before you start cooking to see the difference. (Don’t use the same toothpick in the cooked ribs, of course!)
Way 2: The Twist Test: Grab one of the center bones and gently twist it. If it starts to break free from the meat, it’s time to eat. If the meat doesn’t move, keep cooking.
Other Methods of Checking for Doneness. These can ruin your presentation so are best avoided. The methods such as:
Firstly, The Bend Test – Pick up the slab with tongs to see if the meat starts to crack in the middle. If the meat is overcooked, you could end up with a pile of meat and bones.
Secondly, The Pop-Up test – Some say that if the meat shrinks away from the ends of the bones, the ribs are ready. However, it’s not a reliable test because the smoker may be too hot and the meat shrunk prematurely.
Finally, The Taste Test (or the Peek-A-Boo Test) – It’s OK to cut into the ribs to see if they’re done when you are by yourself, but honestly, would you cut into a steak and then serve it to someone else?
We hope that you have enjoyed our list of the 321 ribs – fall off the bone smoked ribs recipe.
A few notice for cooking
Notice 1: For those of you who don’t want to mess with figuring out temperatures or times that might not turn out right – here’s a proven method that works! This method will make fall off the bone smoked ribs every time: Add apple wood chunks to the smoker. Add ribs and let them smoke for an hour. Remove ribs from the smoker. Wrap tightly in several layers of aluminum foil. Return wrapped ribs to the smoker. Smoke again until the meat is very tender (about two more hours). Open up foil and brush sauce on top. Return to the smoker for about 10 minutes. Let rest slightly. Cut into individual bones. Finally, when you are ready to eat your finished smoked spare or country ribs, pull off any large pieces of fat that remain on the bone. The best way to do this is to grab a sharp knife and run it along the bone as close as possible without cutting into the meat itself. This will help increase the amount of juice in the meat while it is being eaten.
Notice 2: Larger ribs take longer to cook, so pay attention to size as you monitor them in the smoker. If you want a less smoky flavor, remove the membrane from the back of the rack before smoking – this will speed up cooking time but we leave it on for best results. For an extra thick and rich sauce, add two Tbsp of cornstarch mixed with water into your favorite barbecue sauce at least 1 hour before serving and then bring to temperature over medium heat until thickened and glossy. This is not necessary if enjoying the ribs dry.
321 ribs – fall off the bone smoked ribs recipe? When ribs are done, remove from the smoker and tent with foil for at least 15 minutes before serving. This is important as it allows the juices to be reabsorbed into the meat after cooking! If you follow these tips, your ribs should turn out bone tender every time! Share this article with all your friends to let them know how to smoke ribs that are tender-falling-off-the-bone good!
Notice 3: Some people say that you should avoid adding any sugar to your meat before smoking. On the other hand, many people swear by it as a great way to help give their ribs a good color and tenderize them slightly. The best practice is to try both ways and see which works out better for you and how you like your meat prepared.
See more: Top 7 Best Smokers For Beginners
Is There A Downside To The 3-2-1 Method?
Juicy, tender ribs with meat that falls off the bone–it sounds like a dream come true, doesn’t it? The term “falling off the bone” seems to get tossed around a lot in discussions about pork ribs, and this technique certainly delivers. That’s what makes it so appealing to beginners.
However, true aficionados will tell you that this isn’t actually the result you should be looking for. You want the meat to come away from the bone without leaving anything behind, but it shouldn’t be so well-done that it slides right off at the slightest touch.
It’s the second step that throws most people off. When you wrap the meat in foil, it’s essentially boiling in its own juices. This isn’t why most people choose the grilling method in the first place, and it raises the cooking temperature to the point where the meat can turn mushy if you’re not careful. The final step of unwrapping the ribs and finishing them at a higher temperature offsets the effect somewhat, but it’s not enough to satisfy the purists. Some claim that it even washes out the flavor, negating the effects of the smokiness that you worked so hard to achieve in the first three hours.
In short, while the 3-2-1 method should earn you high marks at a typical backyard barbecue, seasoned pros are likely to view it as cheating.
>>> See more: 3-2-1 Ribs – How To | 321 ribs – fall off the bone smoked ribs recipe
Conclusion
321 ribs – fall off the bone smoked ribs recipe: We hope you guys loved this recipe. The 321 Ribs and 221 are the most common recipes we use, but feel free to experiment with different ingredients or cooking times if you want a new flavor! Remember that it’s important to cook our ribs long enough so they’re easy to pull apart without them falling off of the bone. If your smoker isn’t giving off any smoke after adding the chips, try putting some water in each pan before filling with wood chips. It should start smoking within 10 minutes at 225 degrees Fahrenheit – Happy Smoking!


