
What is the standard grill size? Everything to know
The standard grill size is a big purchase and you want to be sure it will fit the needs of your family. This blog post will help you figure out what size grill is right for you with tips on how to choose one that fits both your taste and budget.
What is the standard grill size? What’s the best way to find the perfect sized grill? With so many options, it can be really hard to narrow down what type of grills are available and which ones suit your needs. We’re here to help! Below we’ve listed some questions that will help you figure out which size is most appropriate for your household: What types of meats do I like cooking? Do I cook often or just once in a while? How many people live in my home? We will further clarify the above question by examining the following points of view.
Table of Contents
What is the size of a standard grill?
What is the standard grill size? When in the market for a grill there are many choices in what size to purchase. The most common options available are:
Small, Medium, Large, and Extra-Large.
The standard heating surface areas of these four grills is as follows:
18000 Sq inches (900 sq. ft) = Small
31500 Sq inches (1800 sq. ft.)=Medium
40000 Sq inches (2160 sq. ft.)=Large
60000 Sq inches (3240 sq.ft) = X-Large
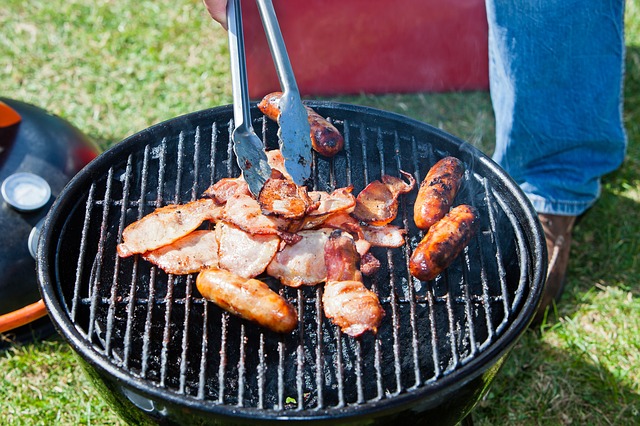
A grill is a cooking appliance. It has a lid and an adjustable height that’s attached to the top, and there are different types of grills such as charcoal grill, gas grill, electric grill and smoker. A standard sized grill can be used in a backyard for barbeque or other leisurely meal with friends and family members. Grilling food outside gives it a smoky flavor which makes the taste more delicious compared to cooking inside in a kitchen stove. Most people use grills in summer because it’s easier to cook in summer when the weather is warmer, whereas indoor stoves usually have natural heating from firewood ensuring faster cooking time.
Grills come in many shapes and sizes but standard tents usually have a height of about 2 feet and a width of 4-5 feet. They are usually rectangular shaped and can fit 2 or more people on it. The grill surface is made up of metal grates which heat the food evenly over them, so they don’t burn the meats.The size of a standard grill measures about 3 x 5 feet.
What is the standard grill size? Therefore, how to choose the right size what you need , we have some the following tips:
Choosing the right size barbecue for your needs is important as it determines how much meat can be cooked and what features you may or may not need. First consider the space that will be required to house the unit; then consider how many people you think you’ll want to cook and feed and how often.
When choosing a gas grill, pay attention to BTU ratings: high BTU measurements indicate more power and faster cooking times, but too much heat can char food quickly if not closely monitored. A general rule of thumb with gas grills is that one hour of grilling typically requires 10-12 lbs of propane (if using 20 lb tanks). Measure your property before shopping for a unit so that you know what dimensions will work.
If cooking space is limited, consider buying a small, compact gas barbecue or electric barbecue. Electric grills are great for smaller spaces and while they may take longer to heat up, don’t require charcoal. If using an electric grill indoors, be sure to keep it away from furniture and drapery.
What is the standard grill size? Consider your budget when choosing your grill; choose one that offers the features that will be the most useful without excess bells and whistles you’ll never use. Some things to look for include: porcelain-coated grids for easier clean up; stainless steel construction so you won’t have to worry about rusting; wheels or casters if portability is required; storage space underneath or on the side to house propane tanks, utensils or other accessories.
To ensure that your barbecue works for many years, it’s important to take proper care of it. Before each use, inspect the unit and replace any missing or damaged parts. Clean the exterior with a soft cloth dipped in warm water mixed with mild detergent; clean the cooking grids by heating up one half of the grill at a time on high heat, then using tongs to hold an oil-soaked paper towel wrapped around the bristles of a wire brush glide over both sides of the grid 10–15 times. Allow for cooling before cleaning again. Always turn off gas valves after use and allow grills to cool completely before storing away. Never store gasoline or other flammable liquids inside a grill. If propane tanks are empty, empty them of remaining fuel at a local service center or dispose of them safely.
In the summer months, consider grilling on your porch instead of using more traditional methods of cooking indoors to take advantage of cooler weather and an outdoor dining experience. A good rule of thumb for choosing barbecue is that one hour on a gas grill requires 10–12 lbs of propane (if using 20 lb tanks). The size of the barbecue you choose should depend upon the number of people you want to cook for and how often you’ll use it. Consider how much space it will take up on your property before making a purchase as well as what storage options may be required given your lifestyle.
You may like this: Top 12 Best Gas Grills Under $200 For You In 2022
How to clean your grill?
Grill cooking is all about impressing your guest with perfect food, not serving charred bits of carbon. When you cook on the grill it can be difficult to keep a tight eye on what you’re making as well as how clean it is so we have the right product for you! Get this professional cleaning equipment to help keep your grill pristine and grease-free.
Cracking surface grime from years of use, blocking off dangerous chemicals from absorption into food, and restoring a bright shine – that’s just a few benefits that our fantastic range of high quality products provide. Take up an entirely new hobby by getting back in touch with fire at your next barbecue! It may cost more than home dish soap but only because it’s worth ten times
Therefore The best time to clean your grill grates is just after they have cooled off. If you leave them on the grill, it will be much harder to scrape off all that stuck food debris – and what a mess it can make! That is the first step.
The second step: Grab a wire brush (the kind with sturdy, metal bristles), and brush down each of the edges and surfaces of the hot (but now cool) grill grates. You should notice some flaking burnt stuff come loose as you do this. Oftentimes the remains of your burned-on food chunks will try to stick back onto the surface as you’re brushing, but keep at it and eventually most things will come free and go into your trash (not down your pipes or onto the ground!).
Once all the gunk is mostly gone, you can grab a soapy sponge and use it to scrub down the grates. There’s no need to get out any stronger cleaners for this job – your grill doesn’t need to be perfect, you just don’t want it looking or smelling gross!
What is the standard grill size? To avoid future build up of burnt-on food bits from sticking onto your grate, it’s best practice to oil them before you put your food on next time. Take a bunch of paper towels and fold them up into long strips. Using tongs, dip them into vegetable oil and then wrap around the grates of your pre-heated grill. This will get everything at least generally shiny again, but not perfectly clean like after you scrub. This will also help your food not to stick as it cooks next time!
The best way to season your grill
If you have purchased a new grill, it is going to take some time to get it seasoned. You need to do this prior to cooking on the grill for the first time. Read further if you want to know how best this can be achieved.
Facts about grilling:
Grilling cooks food quickly over a direct heat by exposing it directly to radiant heat, hot air or both
This means that for your grill’s surface temperature to reach its optimum level, the metal has to be as hot as possible. The more you can make your grill “seasoned” (or seasoned like the condition of your choice), the better the results will be when using it later on. Old and crusted surfaces burnt into the metal will not be as effective and the food might end up tasting like it has been cooked on a dirty grill.
There are several ways to season your grill, but we recommend the following:
Directions:
Using a piece of aluminum foil, cover an entire rack with oil; place directly underneath where you can cook (if possible) place direct heat source under the aluminum foil (like a stove’s burner); let it cook for 1 hour
It is best to use refined sunflower or another kind of vegetable oil because those do burn at high temperatures and won’t leave their flavor behind in your food. Also, they don’t go rancid as quickly as other oils, so this way you’ll save money and get better grilling.
After an hour, remove the foil and let the grill’s surface cool down for 5 minutes.
You don’t want to burn yourself, but you also need to make sure that not too much oil gets stuck in the pores of your grill. If this happens, it will get sticky when hot and thus affect the temperature of your grill negatively by letting less heat escape through evaporation.
Using lots of paper towels or old rags, wipe away any excess/leftover oil on the surface of your grill.
Be careful so you don’t damage its enamel coating. You should only have a thin layer left over that has penetrated into the metal under all surfaces. It is best if you can use an old rag that you don’t mind throwing out afterwards to wipe away the oil. You can use paper towels, but they might leave little pieces of themselves behind when thrown into the trash. This will result in tiny clumps in your grill surface and might also be unsightly if you notice it later on when cooking.
Preheat your grill for 15 minutes over high heat.
At this point it is best to open all windows in your house or turn off any smoke detectors so that there won’t be extra smoke coming from the oil burn off process. The exhaust fans in most households are usually not strong enough to get rid of this immediately because they are meant for normal everyday cooking where there’ll be much smoke produced during the process.
After the 15 minutes are up, reduce the heat to medium and grill your food as usual.
What is the standard grill size? When this is said and done, you have a seasoned grill which will now provide you with excellent results every single time! Just remember to never place cold food on a hot grill surface because it will cause meat fibers to shrink unnaturally, juice will spill out of the meat onto the flames below where it will burn into smoke that can taint your future food or even start a fire. If you want your grilled foods to taste perfect, make sure they are at room temperature before placing them on the grill surface.
See more: Top 9 Best 2 Burner Gas Grill
Cleaning and seasoning with oil or cooking spray
Cooking spray and other oil-based sprays can be used to prepare a pan for cooking. This process is known as “seasoning” the pan. As the name implies, seasoning involves preparing the surface of the skillet or pot with oil that will prevent food from sticking to it during cooking. It also draws out moisture, causing the food to brown instead of steaming. Cooking spray may also be used on cookware that has previously been seasoned in order to assist in maintaining its non-stick properties. Seasoning should always be performed if a new pan or skillet is brought home; it enriches and enforces non-stick properties over time and usage, and also reduces the risk of foods sticking while cooking (which can result in burning).
Cooking spray may also be used to prepare a pan for cleaning. This process is known as “cleaning with oil.” As the name implies, at least some of the liquid cooking oil will be left on the pan after it is cleaned. The purpose of this step is to prevent rusting and pitting, which usually occurs when water comes into contact with bare metal or steel cookware. Cooking spray should not be used to assist in removing burnt food from pots or pans; if soiled enough that it cannot be scrubbed away easily with soap and water, rinse the pot well under hot running water, allow it to soak for several hours before applying dishwashing liquid directly to stains (not only will the soap and water combination soften or dissolve the residue, but it will also help prevent rust by leaving oil on the pan), then gently scrub with a non-abrasive plastic brush. To protect against pitting and rusting once the pot has been cleaned, simply wipe the exterior of the cookware with a paper towel to remove any cooking spray residue (which otherwise can attract debris and dust during storage).
Cooking spray is typically considered a healthier alternative to other forms of fats (such as butter) when cooking because it adds little flavor and may be used in greater quantities without adding calories. However, some cooking sprays are high in sodium; always check the ingredient list before use. Consuming too much salt can cause increased blood pressure levels in some individuals.
Used cooking spray/oil should not be disposed of in the sink, as it will harden into a waxy substance that may cause plumbing problems over time. Instead, allow it to solidify then scrape or wipe up excess residue before placing it in the trash.
The are several different ways: (What is the standard grill size?)
The first step of the process is usually to rinse off any food which is stuck on. Once this has been done, there are a number of methods for removing any leftover residue. A good method if the pan isn’t too dirty is to use salt and soap. Salt can be used as an abrasive cleaner on pans that have cooked something more likely to leave a sticky residue behind. Just sprinkle some salt onto the surface of the pan then rub with either soap or water until a paste forms over all of the area in question. Continue rubbing until the area is shiny and free of residue. This works well for pans that have only cooked cheese, eggs, or other sticky foods.
You can also clean pans in the oven if they are particularly dirty. Put them into your cold oven then heat it up to 250 degrees Fahrenheit (121 degrees Celsius). Once the oven has reached this temperature turn it off and let the pans cool down inside of it overnight. This will get rid of any burnt food while making sure you don’t burn yourself by trying to clean them when there are still hot spots remaining in the pan.
There are several different ways you can season a cookware set so it will be easier to cook with and stay looking nice for longer without requiring too much cleaning. Ranging from simply coating the pan in lubricant to firing it up in a high heat oven, there are several ways to get an even coat of seasoning across all of your pans.
To begin, coat the pots and pans with oil using either a pastry brush or clean cloth. Ensure that no areas have been missed, including the outside rims which need to be well covered. Put the cookware into an empty cold oven then turn it on to 400 degrees Fahrenheit (204 degrees Celsius). Most oils will burn at this temperature, imparting a nice flavor while also leaving behind a protective layer for cooking purposes.
One of the traditional ways of getting seasoned cookware is by heating up oil inside each piece while still in their raw before use. This helps ensure that the oil gets into all of the possible nooks and crannies inside of each piece to make certain that they are fully seasoned before use. This also works well for keeping your cookware non-stick without using teflon or other synthetic coatings.
You can bake on seasoning by heating each pan upside down in a high heat oven, preferably one which goes up to at least 500 degrees Fahrenheit (260 degrees Celsius). Once this is done, transfer them back to a cold oven to cool off overnight with nothing in them. The next morning, remove them from the oven then gently wipe out any extra residue which may be present with either cloth or paper towel. For any areas where there is stubborn built-up food or seasoning, you can use a stiff metal brush or green scrubby pad to remove them.
Once they are clean, you can also re-season the cookware by repeating the previous steps. For cast-iron pots and pans, it is recommended that you use lard when seasoning instead of vegetable oil. This will ensure that your cast iron is fully seasoned at an even rate which makes it easier to care for after this process is complete.
After cooking using your new set of pots and pans for a while, there may be some areas where food starts to stick even with regular cleaning if you tend to burn things often. In these cases, all you need to do is repeat the seasoning process mentioned above but heat up the oven as high as possible without causing the pan to warp or crack. You can then hand-wash them with warm water and dish soap, avoiding the use of any metal implements which may scratch the metal inside.
To avoid having food stick to your cookware completely you can always try using non-stick pans instead. These are made out of either ceramics or teflon which will make it easier to clean afterwards since there is little risk for food residue buildup over time. This also makes it easy to flip eggs without worrying about tearing apart the yolk or smashing the whites into a pancake formation.
There are several benefits that come from seasoning your cookware properly before use including less sticking, faster cooking times due to heating more evenly, and much easier cleaning later on. If you are having trouble with food sticking to your cookware, the best thing to do is simply repeat the seasoning process as outlined above. This will ensure that everything is non-stick and easy to clean in the future without requiring too much elbow grease.
Read more: Top 7 Best Smokers For Beginners
Cleaning and seasoning without oil or cooking spray
A lot of people are into the oil-free diet nowadays. Despite the common belief that oil is bad for you, it has actually never been proven scientifically. It has its benefits and contributes to good health but it’s just how much of it you consume in your daily life that adds or takes away weight from you. Low fat dieting is the in thing but it doesn’t mean that you have to go without oil altogether. If you are into low fat dieting then simply use cooking sprays which function similarly with oil. However, there are people who still want to be healthy but don’t find cooking spray beneficial enough for their health needs.
What if I told you that there is another way to season your food aside from using cooking spray or oil? What if I tell you that drinking water can also function as an alternative solution? Believe it or not, this method actually works effectively because the properties of drinking water allow it to reach all areas of your pan and cookware. When drinking water gets heated up, its molecules expand allowing even distribution of heat within the entire surface area of your pan.
You may ask, then how can I clean my pan using only drinking water? Well, this method allows the food to stick which is a good thing because it makes removing hard dirt and stains easier. It also saves you from purchasing any chemical-based cleaning product or paper towels for that matter. Just remember not to use soap when washing your cookware with water because it will strip away the seasoning inside your pans and pots which leads to rusting of your tool if left untreated.
Here are some ways on how you can properly clean and season your pans without cooking sprays or oil: (What is the standard grill size?)
The first step: Fill up a pot with cold water until just below the brim of the pot. Let the pot heat up with its lid closed. Add just a squirt of dishwashing soap and leave it until the water boils.
The second step: Take out your pot from the stove and let the water cool down just enough before emptying it completely. This removes all dirt and grime so you can reuse it again or simply transfer the contents to another clean pot for storage purposes.
The third step: Fill up your other pot with cold water and add 1 tsp of salt to it as well as a squirt of dishwashing soap (optional). Completely submerge your pan into the boiling mixture then take out your pan using tongs when you see that all food is removed from its surface at ease.
Finally Heat up your pan in order to dry off excess moisture then turn your stove off. You can now season your pan using fruit or vegetable oil with a paper towel. Return the pot to the stove and turn it on for a couple of minutes to evenly distribute oil in all parts of your cookware for ultimate protection from rusting.
Now you have a perfectly seasoned and clean pan within just a few minutes! Follow these steps as often as needed so that you can properly maintain your pans without cooking sprays or oil . If the use is extensive, then simply follow this method at least once every month. Your pots and pans will not only look brand new but also retain its non-stick properties longer than one would expect.
Be sure to be very careful when cleaning or handling hot materials such as cookware and utensils. Always wear protective gloves and eye gear for your safety as well as those around you so you can enjoy your cooking activity without distractions.
Why you should never use soap on your grills surface
Soap is particularly bad for cast iron grills because it erodes the seasoning coating found on most cast iron surfaces. The seasoning is a layer of oil-based polymerized fat mixed with carbon from the food you cook in it. It acts as a barrier between the metal and anything else that might cause it to rust or corrode when in contact with water or moisture. You want to avoid using soap whenever possible when properly seasoned , an extremely low chance of ever having issues with rusting due to rain, snow, condensation, etc .
The real issue comes from improper cleaning. If you just rinse off your grates with water after cooking, without properly cleaning them beforehand, then yes, the whole thing is at risk of rusting over time. On the other hand if you clean it properly before any sort of extended period between uses (say, one month), and follow up by immediately drying it and applying a thin film of oil to protect it, you will never have issues with rusting or corroding.
The way I clean my grill is very simple: Remove all food bits stuck to the surface using hot water and/or a scraper tool. Scrape away anything that doesn’t want to come off easily. Then put some soap on the surface, scrub away with a bristle brush or steel wool, rinse with hot water , and then dry it off thoroughly. Finally I apply a thin layer of oil to the surface before stacking it away. No rinsing required, no harsh chemicals needed.
Another myth about cast iron is that you should never use soap on it because it will “destroy” or ruin your seasoning. If you read the first section again carefully though, you’ll notice that here I said to only use soap when necessary (which is actually extremely rare), not to never use soap at all. The reason why people think cast-iron requires no soap whatsoever is because they’re usually thinking of the seasoning as just a protective layer over the bare metal itself. It’s as if once this layer gets scratched or removed, every single spec of metal is exposed and needs to be protected from rusting.
Think about it this way: What if I told you that cast iron grills could also be used as frying pans? You’d probably say something like “oh hell no, the surface would rust the second I put some oil in there”. But this is exactly what people do when they use so much soap on their cast iron grills . It strips away the seasoning, exposing bare metal and leaving nothing between that and water/moisture except for a thin layer of oxide that even soap can strip away. If you just don’t rinse your cast iron grill with any kind of liquid after cooking, then yes, you’re putting it at risk of rusting. But if you rinse it off with hot water after cooking, clean out the leftover bits using a brush or scraper, apply some soap where necessary, give it a good scrub to get rid of anything stuck on there, then rinse it with hot water again to remove any traces of soap before drying thoroughly and applying oil , you should have no problems.
See more: Best Electric Griddle Consumer Reports – Unbiased Guide 2022
The benefit of types of grill brings for us
Every summer weekend, thousands of people enjoy outdoor cooking with a grill on their weekends. Though some grills are inexpensive and simple to use, others can be quite expensive and sophisticated. A number of different types exist from which to choose. When you do not know anything about them or what they can do for you it is difficult to decide which one to get and use in the future. By understanding how each type of grill is used and their benefits, you can determine what kind will suit your needs best.
These grills use propane tanks or natural gas piped into them as the source of fuel. The burners underneath produce direct heat when turned on so food cooks quickly and evenly on the grates above. These grills are more expensive than charcoal grills but they offer quick cooking times and an even heat distribution. The convenience of using this type of grill is that you do not have to add coals or lighter fluid, just turn it on. Also, if needs be, you can shut off one burner to cook food slower.
Grilling with charcoal offers a smoky flavor since the flame heats the briquettes until they glow red hot. Charcoal emits limited amounts of dangerous gases so they are considered safe for cooking outdoors. To prevent flare-ups which can char your meat, keep the lid open while you cook and position the food away from the coals. If you have a large family or plan to entertain outdoors, buy a grill with multiple cooking stations. Another benefit is that this type of grill can double as a smoker which allows your food to get flavored with smoke for hours.
These grills are gaining in popularity because they offer convenience and ease of use by using electricity instead of propane gas or charcoal. They produce high heat in less time but do not emit dangerous gases like their gas cousins. Electric grills work well when cooking small portions of meat and make perfect pancakes, eggs, bacon, etc… The downside for some people is the lack of flavor compared to traditional grilling methods but these small grills are great for smaller families or couples.
These outdoor grills are usually no more than two feet in diameter. They are used mainly to cook food quickly over direct heat. Traditionally, hibachis were made out of cast iron but now they can be found in stainless steel, aluminum and ceramic materials. The main benefit of using these types of grills is that they will impart flavor to the food similar to how a traditional brick oven works.
These popular grills have domed lids with vents on them which help control the airflow within the grill. This means that you can increase or decrease the airflow, thus affecting the temperature inside. The amount of food they can handle really depends on size, between 175 to 400 pounds. Smokers consist of three parts: firebox where fuel is burned, water pan where water is added for moisture and heat control, and cooking chamber which houses the food being cooked. These types of grills are perfect if you have time to slow cook your food over several hours because it allows the juices to drip onto the coals and saturate your food with smoke.A rotisserie is great tool for grilling large quantities of meat or vegetables. It can be either powered by electricity or fueled by charcoal. The rotation of the spit ensures that the heat will cook all sides evenly, thus resulting in a nice brown crust without overcooking the other side.
>>> See more: What is the standard grill size? | How to Choose the Right BBQ Grill for You
What is the standard grill size? – Conclusion
What is the standard grill size? The size of the grill you purchase should not be based on how many people it can cook at one time, but rather what type of food you are cooking. If your intention is to only prepare meats and vegetables then a medium sized charcoal or gas grill would suffice. However, if you plan on grilling large cuts of meat like whole chickens or rib-eye steaks then an extra large charcoal or gas grill will work best for this purpose. You may also want to consider adding in some more accessories such as rotisseries, smoker boxes, side burners and warming racks depending on what types of food you typically make with your grill. It’s important that before making any final decisions about which kind of barbecue equipment to buy.
See more:
Napoleon vs Weber grills: Which One Should You Get?


