
You finally bought a beautiful cast iron grill for your outdoor living space. A well-seasoned cast iron grill grate is a highly prized item in the world of barbecue. But now you’re faced with a new problem: how do you clean the grates? The grates on your grill can accumulate some serious gunk over time, and it’s important to know how to clean them. Some people think that cast iron grill grates are difficult to clean. Every cook knows the struggle of cleaning cast iron grill grates. The food residue, grease, and oil that is left behind after cooking can be a pain to clean up. Even worse are the rust stains that often accumulate over time on your cast iron grill grates because they are not properly cared for. This is not true! All you need is a little time and patience, some dish soap, and a scrub brush or scraper. Luckily, we’re here with some tips for cleaning cast iron grill grates.
How To Clean Cast Iron Grill Grates? A Step-By-Step Guide
How to clean cast iron grill grates? The first step is to remove the grate from the grill and let it cool completely if you don’t want to burn yourself. The second step is to remove the crusty layer of grease and food particles by scraping with a metal spatula or scraper. You can use oven cleaner on stubborn stains if needed. The third step is to scrub the surface with salt and water for about an hour to clean off any residue left behind by the oven cleaner. Let it air dry before cooking again! A few tips before we get started: Cleaning the grates with soap is not recommended because it can leave residue on the surface which may cause food to stick when cooking; instead use hot water and dish soap, especially preferably an eco-friendly brand, mixed in a bucket or large pot, then scrub with steel wool pads or scrapers.
Table of Contents
Items that need to be prepare before cleaning cast iron grill grates
Whetstones – These whetstones can be used to sharpen knives and other purposes like sharpening the edges of the grill grate after using it for too long (rusts). It helps prevent scratching blades or any tools intended for these purposes. There are different sizes available but make sure to choose the coarsest whetstone available. You can use it dry or wet by adding water to make it a paste. Make sure the stone is free of dirt and debris before using it for sharpening.
To avoid scratching your floor, place an old towel onto your working area. It will protect your countertop or any surfaces in your kitchen when you need to sharpen the edge of your cast iron grill grate.
Steel wool – This item will not only clean any grime and rust off from the surface of your cast iron grill grate but this is also good in preventing scratches on its surface like what was mentioned earlier when we said that whetstones are used for sharpening purposes preferably with knives because it will not scratch off the surface of your cast iron grill grate.
Sandpaper – This is also an effective item that can be used to remove rust from your cast iron grill grates. You just need to use it gently on the areas that are rusted so you will not have a hard time cleaning them later on.
A wire brush with plastic handle – This is made of stainless steel so it’s very safe for you to use this for cleanliness purposes especially if there are stubborn burnt spots left behind by previous meals cooked using the cast iron grill grate. Also, soft bristle brushes are ideal for this task because they don’t leave any scratches on the surface of your cast iron grill grate.
Oven cleaner – This is used to clean off any burnt particles on your cast iron grill grate. Simply spray the oven cleaner on the affected areas and scrub it gently so you will be able to remove these burnt particles with ease. Make sure to wipe it out using a wet cloth once you are done cleaning your cast iron grates so it will not cause corrosion or rusting.
How to clean cast iron grill grates? Finally, It’s a good idea to wear gloves when cleaning, as it will help avoid oil opening on your skin and protect you from the chemicals.
Remove the cast iron grill grates from the stove
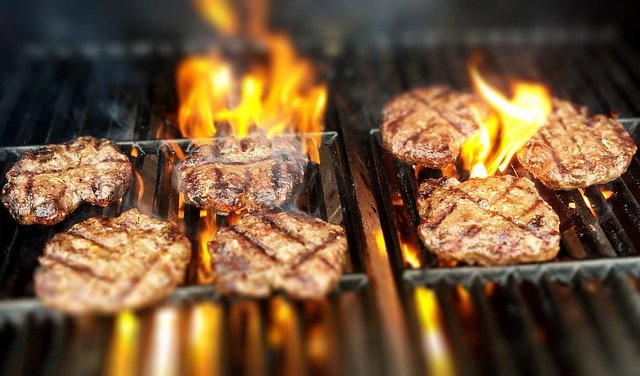
The grill grates are an integral part of most grills. The grates cook the food placed on it by heating up, thus searing the surface of the food and sealing in its flavors. Grill grates are made from different materials like steel, cast iron, or porcelain-enameled metals.
A cast iron grill grate is generally preferred for even heat conductivity over other types of materials. And that is why they are used as a standard on pellet smokers though there are few gas smokers which also have them installed to distribute heat evenly across the cooking surface.
They come in various shapes and sizes just like any other regular grate but they last longer than other types making them worth every penny you spend on them.
They do not warp over time, something that happens with steel grates when exposed to high heat for prolonged periods. Even when rust occurs on the grate, it is an easy task to restore its original appearance by simply seasoning it in oil or lard and baking it in the oven until the fat becomes baked-on. This process of seasoning will also provide a nonstick cooking surface.
Because of the above benefits, the cleaning of the cast iron grill is very important. And the first step is to get them out of the stove. You should know how to remove the cast iron grill grates from the stove. On many occasions, we might need to change a new one because it is broken or dirty.
To avoid any potential fire hazard that may result from rusting cast iron cooking grids and burners, you must remove them before moving your range. Removing cast iron cookware will also protect you during a countertop installation by preventing cutting yourself on sharp edges or dropping heavy cookware while transporting it out of your kitchen.
Your gas stoves come with cast iron cooking grids and burners. The cooking grids are designed not to warp under intense heat and provide a stable platform for burning gas flames. If the cast iron grates break or become warped, you can replace them yourself by simply unscrewing the screws that hold them in place and removing the damaged grates.
Free up some space by laying down an old towel on which you can lay your stovetop to be moved! Small rugs or even sheets of plywood work as long as they will protect both the countertop and range top from scratches while protecting the floor from any drops of heavy stoneware lids etc. Underneath, place another tile or board so you can easily move and slide your range and not scratch up the floor.
Slide a thin, flat bar or piece of wood under the front edge of the cast iron cooking grids to lift them from their supports on top of the stove. You might need to use another set of hands to help support the weight when you remove it. If there are no supports underneath, you can simply grasp each edge with your hand and remove the top of burners that will hold it in place during removal. Never try to lift a heavy cast iron grate by one end because it can break in half! Be careful when handling a grill grate because pieces may fall off due to rusting through which could cause injury if they land on feet or toes.
Remove burners by pushing in the tabs on the side of each burner base and sliding the whole thing back towards you. Never try to lift a heavy burner by one end because it can break in half! When removing the cast iron grates, slide them toward the front of the stove, then push or pull them through the space where burners were located. Verify that no screws or other hardware are blocking their removal before you start pulling since this change might have been done already depending on your model range.
Put new grate supports under cooking grids for support while tightening screws back into place. Turn overcook in the grid so the bottom side is facing up and tighten all screws making sure they are not too tight or else they will crack.
Pay attention to when to remove the cast iron grill grates from the stove to avoid burns. Make sure the temperature is safe to clean the grill and it is best to wear gloves to protect your skin.
You may like this: Top 9 Best Smokeless Indoor Grill
Put the cast iron grill grates in a sink with water and dish soap and scrub the grates with a stiff brush, scrubbing them in circles to remove any stuck-on food particles
To keep your barbecue looking its best, it’s important to clean the grates from time to time. You can use hot or cold water and dish soap in order to clean off any stuck on food residue that accumulated over an extended period of usage; just make sure you put a little bit under each grate before putting them into either sink so as not to damage other parts by accident!
How to clean cast iron grill grates? A good way to be safe is using less concentrated detergent when cleaning with cold liquid instead of removing the whole grill lid then submerged the entire surface area.
Take a metal bristle brush and scrub the grates from right to left several times. This is because you want to keep the bristles of your grill brush facing down as you move it over the grate – if you go in a back and forth motion, some of those bristles will curl up and start scratching your grill grates instead of cleaning them.
Don’t forget to also clean the drain holes on the bottom of your grill grates, as often debris can accumulate there which can affect how well they cook. There are a few things that can cause the buildup on your cast-iron grill grate. The most common culprit is fat from meat or cooking oils that drip onto the hot metal surface and cool down, creating a sticky film on top of its surface. This layer of gunk will collect all sorts of food particles as well as other bits like dust and ash, which make cleaning difficult if they accumulate on top. To keep these nasty substances at bay, regularly scrape off any excess food residue with a spatula while it’s still warm.. After brushing out all food particles, rinse very thoroughly with cold water. Do not use hot water as this may warp or crack them leading to rusting. Also avoid putting too much force on steel grill grates, as this may cause bending or warping.
Now it’s time to oil the grates. Use a paper towel to spread coconut oil all over both sides of all the grill grates. Don’t be afraid to really go for it here! Be sure to get in between each grate so they don’t stick together while cooking. This will now sear your grill marks into the surface and keep food from sticking too much during high heat cooking like searing steaks or chops though you do still want them to stick enough that there are yummy crispy bits left behind; then flip them for an even cook.
The good news is that you can keep your stainless steel grill grate looking great simply by regularly cooking on it – most of the scars left behind will naturally burn off with cooking. Also, if you want to remove any stubborn stains or grease buildups, you can use a little baking soda paste made with water and maybe some dish soap, rubbed into the grates with a stiff bristled brush. Be sure to rinse them really well after cleaning so they don’t taste like baking soda! You may also want to clean the bottom side of the grill grates with this method as well, depending on how much gunk has built up there. If you still see rust spots after all of this, you’ll need to take a steel wool pad and scrub them off with the foil side until they’re gone.
How to clean cast iron grill grates? It’s an easy way to clean our cast iron grill grates with two simple ingredients: kosher salt and lemon juice or vinegar. All we need to do is mix the salt in with some lemon juice until it’s saturated enough where it won’t dissolve anymore when we rub it on our cast iron grate. The process is similar if we use vinegar, except we’ll want to mix the salt in with it first. Then, simply take half of lemon or lime, cut off both ends and start rubbing the citrus fruit on the cast iron grill grates until all the built up grime is gone. Make sure to scrub a little bit harder under high heat so that food debris comes off easier.
Rinse off the soapy water with hot water
Before using your stainless iron grill grate, be sure to wash both sides of each one in cold water only meaning no soap, then dry thoroughly. This is a really important step that shouldn’t be skipped! You’ll thank yourself later when tasty bits of food don’t stick because you didn’t clean your grates first.
After a big grilling party, you might find some stubborn bits of food leftover on your stainless steel grill grate. No worries, though! You can easily remove those with a metal bristle brush or coarse salt and some cold water – just scrub the grate from right to left several times as hot water can warp it. This is especially useful if you’re using your grill for smoking as well as general cooking as the more charred bits that accumulate on the surface, the better they’ll season and keep your meats moist while cooking. If the stains are particularly bad after all this scrubbing, try boiling some water in a pot on top of them for about 5 minutes before washing with soap and cold water again. Let them dry thoroughly to prevent rusting.
When grilling with stainless steel grill grate, you should brush the top side of each grate twice during a full cook, once in between flipping and once after – doing it more often will risk warping them from the heat. While brushing is pretty normal for most types of grates, make sure not to press too hard as this may cause damage. On the other side of things, Do not use any wood or metal tools or utensils on your stainless steel grill grate – only strong bristle brushes are safe for this purpose. Wood and plastic wands can scrape off paint and end up leaving ugly marks that won’t come off easily! Also avoid scrubbing any painted parts very much.
How to clean cast iron grill grates? Users recommend cleaning cast iron grill grates with a well-wrung damp cloth, a nylon scouring brush and a little dishwashing liquid. There are also special metal cleaners that can be used on cast iron grill grates. Fine steel wool or even a stainless steel grill cleaner can be used for final cleaning if you remove all excess oil before applying your second thin coat, otherwise this should be done after they have dried completely to avoid scratching the surface once it has cured.
Dry thoroughly by placing the cast iron grill grates over your stove burner or outside where they can dry completely
A baking sheet for easy transfer under the broiler where they’ll get heated until any remaining moisture has evaporated off due to heat. This step will create a nice smoky atmosphere in the kitchen and give your cast iron grill grates that nice rustic flavor.
If you don’t have an oven, turn on your broiler to high heat and place your clean cast iron grill grates under the broiler. Keep a watchful eye so that they don’t melt or warp from too much direct heat exposure. You can also use this method if you’re camping and want to save on stove space during meal prep time.
Why is this important? Manufacturers of heavy-gauge stainless steel cookware say that heating their products over an open flame is the best way to “season” them. This process stabilizes any surface oxides at a molecular level to create a non-stick surface treatment that is durable and long-lasting. The black markings you see on the grill grates after heating is actually carbonized protein (meat juices, etc.) which creates flavor profiles you wouldn’t get otherwise.
After all the food bits and gunk have been removed from the cast iron grill grates, dry them with a towel and let them air-dry completely or use a paper towel to remove excess moisture still clinging to the surface of the metal. Turn on the range hood fan while drying so that any remaining moisture is quickly whisked away.
Iron rusts easily when it combines with oxygen in water, especially saltwater. Salt causes more corrosion than freshwater alone because it’s corrosive enough by itself without having any other ingredients to help fight it off. So, even though we know that some people do rinse their grill grates with water after they are done cooking, it would be best not to.
When the cast iron grates are completely dry, place them on the open flame of the range to re-season them in order to create that slick protective coating. Grill masters seem to agree that this step is necessary because the new seasonings formed will bond to the bare metal better than if left alone.
If you don’t have an open flame source nearby, turn up your oven’s broiler so that it gets nice and hot. Place your clean cast iron grill grates onto. If you have a self cleaning oven, the cast iron grill grates will need to be cleaned with soapy dishwater. Immediately following, dry thoroughly by placing them over your stove burner or outside where they can dry completely. Be aware that clean cast iron grill grates made shiny inside with soap will rust if left in the open air.
Coat all sides of the grill grate using cooking oil (can also use vegetable oil) for easier cleaning next time you use it!
Once the cast iron grill grates have cooled off, use an oiled paper towel to apply one coat of vegetable cooking oil onto them. Be sure to coat the entire surface of the cast iron grill grate evenly using your hand or a paper towel to rub it into all those nooks and crannies where food particles could become stuck later on down the road. When heated over time with any type of fat or grease, oils will begin to “cure” and form a polymerized surface much like plastic or glass would when treated with heat. This will create a natural non-stick coating to make it easier for future cleanings because any food bits will easily slide off without sticking.
Once you’ve applied your first coat of oil, turn on your oven to 400°F then set the cast iron grill grates in the center rack position right under the broiler. Keep watch so that they don’t burn from direct exposure to either source of heat for about 20 minutes until a nice glossy sheen begins to appear throughout the metal’s pores. If your grill grates have been well used for years before being replaced, this could take closer to an hour due to all the blackened gunk still stuck on the surface.
Turn off your oven and let them cool down to room temperature before handling them again. If you leave them in the oven after it has cooled off, moisture will start to form on the metal which could ruin all your hard work. The high heat of an oven is needed for cooking purposes but it’s also necessary to create that slick non-stick coating you’re looking for during re-seasoning so that food bits won’t stick anymore. This is particularly important because even though stainless steel grates are solid pieces of metal with no pores like cast iron grates can have, there can still be areas where grease dripped onto them over time might become difficult to wash away if they’re not heated up first.
Now, get to cleaning! You can just give them a simple wipe with hot water and soap or if you’d like, use some coarse salt and oiled paper towels to scrub the grates in circular motions. A word of advice though – don’t be too aggressive when scrubbing because cast iron is quite brittle in nature which means it can crack under pressure. They usually last for years before needing replacement but why not take good care of them while they’re around?
The oil should be warmed but not hot and applied using a long-handled brush or cloth to evenly coat the surface of the entire steel grill grate.
Vegetable oils can be applied on cold metal surfaces and will not harm stainless steel finishes when used according to these instructions. Do not use non-stick cooking sprays or oil mixtures such as olive oil for this purpose as they tend to leave sticky residues that attract dirt and food debris after time which increases sticking on colder seasons of operation during storage conditions outdoors.
If you live in a high humidity area it is recommended that you wipe down the surface with vegetable oil after each use. This will not only prevent rusting but also help protect them from the elements during periods of non-use. Applying a thin layer of vegetable oil over the entire surface helps prevent rusting while providing a smooth, shiny finish to stainless steel grill grates. Vegetable oils will penetrate into the microscopic pore structure of the metal, providing a smooth finish that helps prevent contaminants from sticking to steel surfaces. For best results apply two thin layers over the length of the entire surface with a short wait period between coats.
After applying one layer, allow it to stand for about 15 minutes before applying a second lighter coat across the entire surface with a clean dry cloth. This is especially important if you have used an oven, as this method does not allow excess oil to drain off of the product before it has reached its curing temperature.
In the sun, If you choose to, you can coat them with cooking oil before placing them in a preheated oven at 350 degrees F for an hour or until they are completely dry. Once the cast iron grill grates are dry, turn off your oven and re-open it just enough so that you can place your cast iron grill grates inside to cool slowly. This will prevent cracking caused by thermal shock.
Start by scrubbing down the cast iron grates with water and coarse salt, adding more salt when needed. This acts as your abrasive to remove any rust or grime from the cast iron grill grates. Next, apply a thin layer of cooking oil over the entire surface of the cast iron grill grates and let them sit for 10 to 20 minutes. The reason you only need a thin layer is that you do not want to trap moisture between the seasoning layers.
Place your cast iron grill grates in an oven set at 200 degrees F and bake them for one hour. If after that time, they feel sticky or tacky, then turn off your oven and leave them inside with the door closed for another hour. If they come out looking dry on top but are still sticky underneath, this is due to excess oil being trapped between the seasoning layers. If this happens, rub a light coat of oil over the top and place them back in your oven for another hour.
Repeat these steps until your cast iron grill grates have been seasoned enough to stop being sticky or tacky to the touch. It is important to not leave them in your oven any longer than needed because they can cause excessive heat buildup inside. Once they are done, allow them to cool completely before cleaning and covering with a protective layer of cooking oil to prevent rusting.
How to clean cast iron grill grates? Inspect each piece closely for cracks or breaks that may have occurred during use or from mishandling. Do not try to hammer out any dents as they can lead to cracks during the re-seasoning process.
Read more: Top 8 Best 3 Burner Gas Grill
Keep your cast iron grill grate clean by following these steps once every few months – this will help keep your home value high
If you own cast iron grill grates, you know how difficult it can be to maintain them and make them look new again. Cleaning the grill after cooking a meal is pretty low on everyone’s priority list and sometimes we forget about cleaning them altogether.
What are the benefits of cleaning a grill grate? The answer is simple. Cleaning a grill grate prevents food from sticking to it and makes it easier to remove when you want to use the grill again for cooking meals. It also keeps your hands from getting dirty when flipping meat over on the grates, which can be dangerous if you have hot sparks shooting out of your grill while cooking. The proper care and regular inspections go a long way towards ensuring safe and efficient cooking surfaces that make your barbecue experience more enjoyable each time you fire up your grates.
>> How To Care For Cast Iron Grill Grates – How to clean cast iron grill grates
Store your cast iron grill grates in an open container that allows air circulation around them at all times; store near stovetop or oven when not in use to help prevent rusting
The grill grates on your propane gas grill are probably the most neglected part of your cooking equipment. Most people will tend to give some attention to the gas lines, burners but neglect the rest. Over time this can lead to a rusty mess that is not only an eyesore, but can affect your food’s flavor as well.
The first thing you should do to prevent rust is to clean your grill grates at least once every six months to remove any grease, fat or food debris that might be burning onto the grates under the surface. Once a year it’s advisable to strip off all of this old gunk with some strong detergent and a sharp scraper, and then re-season them with an even coating of oil or shortening. You’ll want to apply several coats over several days and remember: Don’t use solid vegetable shortening, as it can build up and turn rancid in storage. I would recommend using either refined peanut oil or lard since they break down slowly when exposed to high heat and don’t impart any additional flavor of their own.
A clean and well-oiled set of grill grates will last you years without any need for replacement, so taking some time every six months to keep them maintained can do wonders for their performance as well as their lifespan! Treating your grill like an expensive car means that it’ll be around for as long as you want it to be.
Store your cast iron grill grates in an open container that allows air circulation around them at all times; store near stove top or oven when not in use to help prevent rusting. Remember, it is a good idea to season the grill grates each time they are used and after cleaning.
Store the cast iron grill grates near the stovetop or oven when not in use to help prevent rusting. Never store them underwater, inside damp containers nor where they will come into contact with other metals for this will corrode them very quickly especially aluminum which is reactive. Avoid extreme changes in temperature such as the garage where moisture can condense on cold surfaces like concrete floors and air conditioning ducts.
And by having my great abraded such as; scuffed or sanded down along both sides of one end on its entire length. This occurred because it laid out flat on its side for months at a time without protection causing the weight of the great to wear into them making them unusable until I had them sanded back down.
The store bought grill grates are too thin and lightweight to adequately protect your expensive cast iron “heirloom” grill grates from damage so you must take precautions or they will be ruined if left unprotected. Do not assume that everything is safe just because they were made of cast iron. Just like anything else, proper care can increase their lifespan significantly… especially when properly cared for at the end of the night.
How to clean cast iron grill grates – Conclusion
The grates on your cast iron grill are likely one of the most important parts when it comes to cooking food. They need proper care to last a long time and keep you from having dangerous fires in your kitchen. A lot can go wrong with these grates, but luckily we have some tips that will help you clean them properly so they’ll work great for years. In this post, we’re going to discuss how you should clean your cast iron grill grates. We’re not just talking about the one-time cleaning either! The more time and effort you take in maintaining these important parts of your barbecue, the better it will perform and last for years to come. To maintain the longevity of your cooking surface, you need to know how best to care for it. And lastly, don’t forget to dry thoroughly after washing!
How to clean cast iron grill grates? This post is to show you some effective ways on how to maintain your cast iron grill grates clean. A cast iron grill grate is a durable and long-lasting material that can withstand the test of time. But it doesn’t mean your grill grates will always look new without some work. To maintain the longevity of your cooking surface, you need to know how best to care for it. It’s always difficult having a dirty grill grate, so be sure to read our tips and tricks before tackling this task next time! We hope these ideas help make the job easier for the next time it needs to be done. And, you should know how to clean cast iron grill grates. This is a very simple process that only takes a few minutes of your time each day and can help prevent food from sticking or burning on the surface while cooking. It also helps maintain a more even heat distribution for better-tasting meals.
Thank you for reading!
See more:


